Frugal Foodie ~ Pesto & Blackberries

I picked up a few bargins when I stopped off  at the co-operative on my way home from work yesterday 🙂  I really should try and pop in there more often, after all I have to drive past it nearly every night 🙂

3 Pots of Basil  £1.10 each normally I got them reduced to 30p a pot saving me £2.40

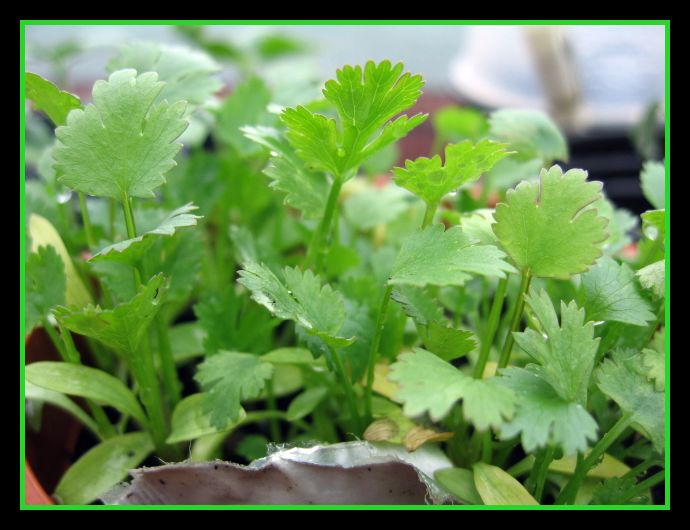
2 Pots of Parsley £1.10 each normally I got them reduced to 30p a pot saving me £1.60

2 packets of Blackberries £2.00 each normally I paid 60p each saving me £2.80

= a total saving of £6.80!!

So tonight I made 2 batches of Pesto…. one for tomorrow night’s tea and one for the freezer,  the blackberries were frozen, they will be a welcome addition to an apple crumble this winter 🙂

Pesto Recipe is a case of throw it in the food mixture until I get the consistency I like

  • Basil
  • Parsley
  • 5 cloves of Garlic
  • Extra Virgin Olive Oil
  • Put everything in a blender and whizz together adding the olive oil through the funnel

Mango Tea Bread

150309-057

I picked up a Mango at the reduced counter at my local supermarket for 20p,  looked through my cookery books and found this recipe… tastes lovely with butter and homemade jam 🙂

Mango Bread

Makes 1 x 2lb loaf

Ingredients:

  • 10 oz (285g) Plain Flour
  • 2 teaspoons bicarbonate of soda
  • 2 teaspoons ground cinnamon
  • half a teaspoon of salt
  • 4oz (115g) Margarine, at room temperature
  • 3 Eggs, at room temperature
  • 10 1/2 oz (300g) Sugar
  • 4fl oz (125ml) vegetable oil
  • 1 large ripe mango, peeled and chopped
  • 3 1/4 oz (90g) desicated coconut
  • 2 1/2 oz (70g) raisins

Method :

  1. Preheat the oven to 350 degrees F / 180 degrees C / Gas 4 and Line the bottom and sides of a 2lb loaf tin with greaseproof paper.
  2. Sift together the flour, bicarbonate of soda, cinnamon and salt.. Set aside
  3. With an elextric mixer, cream the margarine until soft
  4. Beat in the eggs and sugar until light and fluffy.   Beat in the oil.
  5. Fold in the dry ingredients into the creamed ingredients in 3 batches.
  6. Fold in the mangie, two thirds of the coconut and the raisins
  7. Spoon the batter into the loaf tin.
  8. Sprinkle over the remaining coconut,   Bake until a skewer inserted in the centre  comes out clean, after 50-60 minutes.   Let it stand for 10 minutes before turning out onto a rack to cool completely.

Just wanted to add a wee warning….. I checked my loaf after 50 minutes because it was smelling like it was ready, when I did it was still gooey in the centre, so I closed the oven door and gave it another 10 minutes.

After 10 mins I went to get it out, and found that centre of the loaf  had sunk, because I skewered it…   Don’t skewer test it until after 60 mins 🙂

 150309-0561

Recipe courtesy of “Muffins and Quickbreads” by Linda Fraser – ISBN 1-84309-585-8

Garlic Mushrooms on Toast

150309-015

Frugal Jumbo Garlic Mushrooms on Toast.

I popped round to my local supermarket last night as I needed to pick up some cat food, and whilst I was in there I spied some Jumbo Mushrooms reduced to 5p per packet, an absolute bargin! I bought 2 packs.. so on the way home I had plans whizzing round in my head of everything I could make with them…  Garlic Mushrooms on toast…. Cream of Mushroom Soup…. and a mushroom pilaf… yumm..

So.. today I have already made lunch (above) the Cream of Mushroom soup is on the cooker bubbling away as I type this and as for the mushroom pilaf, that will be made tomorrow 🙂

For the Garlic Butter I used :

  • Lightly Salted butter softened (at room temp)
  • 2 cloves of Garlic, finely chopped
  • about a teaspoon of dried oregano
  • Mix all the above until combined well
  • Turn the mushrooms upside down and Spread the butter all over
  • Place in an ovenware dish and bake in the oven at 180 degrees C for 15 minutes
  • Place a couple of slices of bread in the toaster
  • When the mushrooms and toast are cooked, place the toast on a plate, pour the excess garlic butter from the dish all over the toast, then place a mushroom on each slice and enjoy with a cup of hot tea

Enjoy!

Hearty Scotch Broth Soup

Hearty Scotch Broth Soup.

210209-007

I have been cooking and baking for a long time now and I am embarassed to admit that I have never ever made a pot of Scotch Broth Soup before {hangs head in shame} … that was until thursday last week 🙂 !  I always had this strange idea that it would turn out to be a disaster and never bothered to make it, but…..  

Whilst I was in the supermarket last week, I picked up a couple of bags of vegetables from the reduced counter,an absolute bargin @ £0.10 pence a bag, and locally grown.. In the bag I got a couple of handfuls of carrots, 2 Onions, a leek and a small turnip, the plan was to make a stew and some soup, so I toddled round to the pulses and dried foods section and picked up a 500g bag of Vegetable Broth Mix.

210209-010

Ingredients :

  • 2 oz Vegetable Broth Mix
  • 1 Medium Onion, chopped finely
  • 3 Medium Carrots, Grated
  • 1 Leek, halved and sliced thinly
  • 1 chicken or vegetable stock cube
  • sea salt and freshly ground black pepper
  • A Tablespoon of Oil and a knob of butter
  • About 1 – 1.5 litres of water

Method:

  • Soak the broth mix overnight, in a bowl cling filmed and in the fridge.
  • Next day rinse the broth mix under cold running water and set aside
  • Take a heavy based saucepan and add to it the oil abd butter and melt
  • Add the finely chopped onion and cook int he pan until translucent/softened
  • Add the grated Carrot and sliced leek
  • Add the broth Mix and combine
  • then add enough water to cover everything in the pan and loosen it all off, you can always add more water to loosen it off should it get too thick
  • Add the stock cube/boullion or granules, Salt & Pepper and mix well
  • Simmer until everything is cooked and the pulses softened…. I left mine cooking for a couple of hours and it was fine.

Verdict : 8/10 – It tasted fab and I would make it again but experiment with adding a diced potato and diced turnip 🙂

Marjoram ~ (Origanum vulgare)

I thought i would feature another herb that I have growing in the garden…. Marjoram

The Marjoram in the garden is covered from top to toe in flowers … and bees!


Marjoram is also known as Oregano. There are three main species

  • Wild marjoram,
  • Sweet marjoram (Oreganum majorana), and
  • Pot marjoram (Oreganum onites).

Sweet marjoram tastes better, so use that in cooking. 

There are many other cultivated varieties but their properties are similar.

The name, Oregano, comes from two Greek words – ‘oros’, which means mountain, and ‘ganos’ which means joy, or happiness.

Native habitat

  • Europe
  • Central Asia
  • North America (where it has been naturalised)

It grows in hedgerows, dry pastures and scrub.

Growing conditions

  • Likes a dry, lime-rich, chalky soil
  • Prefers a sunny spot

Parts used

  • Leaves

Properties

  • Antiseptic
  • Relaxing
  • Tonic

Uses

Cooking

  • Blends well with basil and thyme
  • Flavours pizzas, sausages and tomato dishes

Medicinal

  • Helps to relieve indigestion
  • A tea made from marjoram helps you to sleep
  • It eases coughs and colds
  • Used as a gargle for sore throats
  • Inhaling marjoram infused steam helps to clear catarrh
  • An ointment made with marjoram eases aching and stiff muscles
  • Good for baths and herbal pillows

History

  • Romans used it in cooking
  • Grown by monks for food flavouring and medicine
  • Used in Medieval and Tudor times as a strewing herb

Folklore

  • Ancient Greeks planted it on graves because they believed it brought joy to the dead.
  • Romans thought it was a symbol of happiness and made crowns of it for couples at their weddings.

Information courtesy of The Herb Society

Rosemary (Rosmarinus oficinalis)

The Rosemary in my garden is looking great at the moment, fresh, fragrant and beautifully green 🙂

Later this month I intend to take some cuttings, so that I can have more of this yummy herb next year in the garden.

Native habitat

  • Mediterranean and other parts of Europe
  • Introduced mainly in Southern England

Growing conditions

  • Light, dry, sandy soil
  • Sunny position

Maintenance

  • Protect young plants from frost
  • Gather flowering tips in spring and summer and hang in bunches to dry
  • Trim bush in the autumn

Parts used

  • Flowering tops
  • Leaves

Properties

  • Pungent scent
  • Moth repellent
  • Attracts bees

Uses

  • Culinary, cosmetic and medicinal
  • Flavours food, especially soups, stews, vegetables and grilled lamb
  • Used in jellies, jams, biscuits and cakes
  • A protection against clothes moths
  • Tonic for invalids; for depression, anxiety and nervous migraine
  • Antiseptic, used externally to heal wounds and mouth infections
  • To preserve teeth
  • As a cough cure
  • To soothe bruises, falls and sprains
  • To keep you young

Some Facts 🙂

  • Name comes from the Latin ros-marinus (dew of the sea), which refers to its favourite habit by salty sea spray
  • A symbol of friendship and love
  • A wreath of rosemary was worn by brides as a sign of love and loyalty
  • Once used in religious ceremonies to ward of evil spirits
  • Pungent scent was believed to protect from disease and infection
  • Used as an alternative to incense
  • Ancient Greeks believed it improved memory
  • Greek students used to wear a wreath while sitting examinations
  • Introduced into Britain by Romans

Information courtest of The Herb Society

Cupcake Addiction….?

I love being off work, I get to be with the kids, my pets and play in my kitchen till my heart is content..

This morning I made the kids pancakes for breakfast, they had maple syrup, homemade raspberry, strawberry and blackcurrant jam on them, they were absolutely delicious (I must put my recipe on the blog).  

I also have my 14yr old niece staying with me for a month, she has travelled over from Greece, so I have 3 ravenous teenagers to feed 🙂

I also made some Salsa (cooked version) which I will put into a sterilised Kilner Jar, which will be used at the weekend for my daughters Cowgirl party, I have decided to do Tex-Mex food for it, and i’m making things piece by piece 🙂

The kids have just come back in from a bike ride along the local coastal path,  I have just finished Icing the cupcakes I made about an hour ago,  as soon as they came into the kitchen they homed in on the cupcakes I guess they won’t last very long!   I did however, manage to get some pictures of them before they disappear

Soooo I’m thinking I might just have a bit of an addiction where it comes to cupcakes/fairycakes, they are just easy to make, and I looove coming up with different toppings for them ..

Jam Making Day

We have been making Jam this afternoon… the whole house smells good enough to eat.

Here is the recipe…. Because we had more strawberries than raspberries, we only had enough rasps to make a small kilner jar of rasp jam.

I halved the quantities used below for the strawberry jam  when making the rasp jam and only used the juice of a quarter of a lemon.   Also a wee note, I used normal unrefined organic caster sugar that contained no pectin and got a good set.

Recipe for Scottish Strawberry Jam

Ingredients:

770g Locally grown Scottish Strawberries

770g Organic Caster Sugar

Juice of Half a Lemon

Method:

  • Wash the fruit if necessary and drain well.
  • Put into a preserving/jam pan.
  • Simmer until some juice has been extracted.
  • Add the sugar and lemon juice, stirring until it has dissolved.
  • Bring to the boil and boil rapidly for 5-10 minutes until the jam sets when tested.
  • Remove the scum and leave to cool slightly so that the fruit will not rise in the jars.
  • Pot and seal while still warm.


Makes enough for a large kilner jar


My mouth has been watering whilst making the jam this afternoon, and once I have cleared up the aftermath in the kitchen, I’ll make some freshly baked scones, just to make sure my jam tastes ok 🙂

Veggie Growing Update…

I have been busy in the greenhouse today, potting on the seedlings

Firstly we have the Courgettes, I have around a dozen plants, last year was so wet here that my courgettes were a bit of a disaster, the flowers came and the fruits formed, then, promply rotted away, so fingers crossed that this year is better and not so rainy!.   Its my plan to put 10 plants out into the raised beds and keep a couple in the greenhouse, just incase.


Next we have the Coriander or Cilantro as its known in other parts.   My daughter planted the seeds and they are thriving away nicely, i’ll be transferring this clump into a bigger pot this coming week.


My tomato plants are growing like mad, I have several different varieties growing here…

Gardners Delight

Microtom

Moneymaker

Totem &

Yellow ones who’s name has escaped me (my memory is shocking..will probably remember 2 days time) 🙂 


My early peas are doing just grand too, these will be hardened off over the next week then planted out into the raised bed.   I have another large batch on the go too which were sown 3 weeks later than these ones.


The chives look fantastic, tiny green spears shooting up towards the sky.. i’ll be re-potting these too next week, then hopefully find a space for them out in the garden somewhere.


My daughter’s sweetcorn is doing great too, i’ll be repotting these into bigger pots this weekend and wait for the weather to warm up before planting them into the garden.